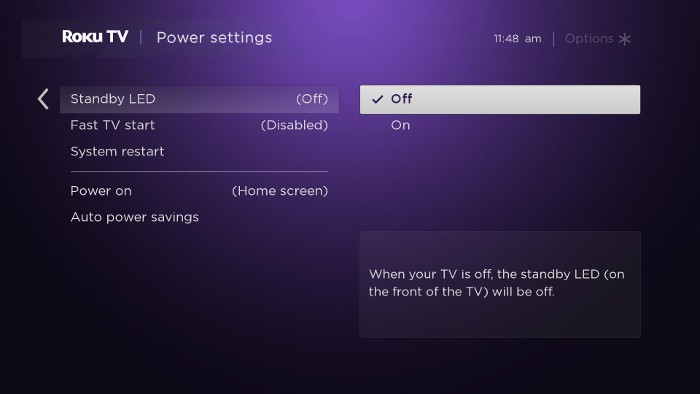
How to change the standby LED setting on your Roku device
There is a standby LED on the front of your Roku TV™ system, Roku Streambar®, Roku Streambar Pro, or Roku® Smart Soundbar that produces a light when the device is in standby.
If you also have a Roku wireless audio device, it has a different type of LED to assist with the pairing process. It produces a solid light when connected and a flashing light when disconnected. On Roku wireless speakers and Roku subwoofers, this status LED is on the back of the device. On a Roku TV Wireless Soundbar, it is on the front of the device.
The instructions in this article can be used to change the standby LED setting on your Roku TV system, Roku Streambar, Roku Streambar Pro, or Roku Smart Soundbar. If you turn it off, the status LED on any wireless audio devices connected to your Roku device will also be turned off.
Consider the following before changing the setting:
- To turn off the status LEDs on your Roku wireless speakers, they must be connected to your TV, Roku Streambar, Roku Streambar Pro, or Roku Smart Soundbar. For help getting them connected, refer to the detailed article about setting up your Roku wireless speakers.
- To turn off the status LED on your Roku TV Wireless Soundbar, it must be connected to your TV. For help getting it connected, read the detailed article about setting up your Roku TV Wireless Soundbar.
- Some Roku TV systems have the standby LED off by default.
How to change the standby LED setting
The standby LED setting can be turned off using the steps below. If a Roku wireless audio device is connected, the setting change will also apply to that device.
- Press Home
 on your Roku remote
 - Scroll and select Settings
- Select System
- Access the LED setting using the appropriate step below:
- On a Roku TV system, select Power and then Standby LED
- On a Roku Streambar, Roku Streambar Pro, or Roku Smart Soundbar, select Advanced System Settings and then LED
- Select Off or On


